
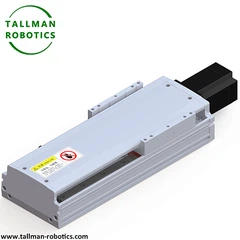


Yo! As a supplier of linear electric cylinders, I've seen firsthand how these nifty devices can revolutionize industrial automation. One of the most common questions I get from customers is how to integrate a linear electric cylinder with a Programmable Logic Controller (PLC). In this blog post, I'll walk you through the process step by step, sharing some tips and tricks along the way.
Understanding the Basics
Before we dive into the integration process, let's quickly go over what a linear electric cylinder is and what a PLC does.
A linear electric cylinder is a device that converts electrical energy into linear motion. It's like a traditional pneumatic or hydraulic cylinder, but instead of using air or fluid pressure, it uses an electric motor to drive the piston. This makes it more precise, efficient, and easier to control. You can check out our Servo Electric Cylinder for a more in - depth look at one of our top - of - the - line models.
On the other hand, a PLC is a digital computer used for automation of industrial processes. It can be programmed to control various aspects of a machine, such as starting and stopping motors, controlling the flow of materials, and monitoring sensors.
Step 1: Choose the Right Linear Electric Cylinder
The first step in integrating a linear electric cylinder with a PLC is to choose the right cylinder for your application. You need to consider factors like the required force, speed, stroke length, and accuracy. For example, if you're working on a high - speed assembly line, you'll need a cylinder that can move quickly and accurately. Our Linear Electric Drive offers high - performance options suitable for a wide range of applications.
Also, make sure the cylinder is compatible with the communication protocol your PLC uses. Common protocols include Modbus, Profibus, and Ethernet/IP. Most modern linear electric cylinders are designed to support multiple protocols, but it's always a good idea to double - check.
Step 2: Select the Appropriate PLC
Once you've chosen your linear electric cylinder, it's time to pick the right PLC. You'll want to choose a PLC that has enough input and output (I/O) points to interface with the cylinder and any other devices in your system. For example, you'll need signals to control the movement of the cylinder (like start, stop, and direction) and signals to monitor its status (such as position and force).
The PLC also needs to support the communication protocol that your cylinder uses. Some PLCs come with built - in support for multiple protocols, while others may require additional modules.
Step 3: Wiring and Physical Installation
After you've got your cylinder and PLC, it's time to get to the physical part - wiring and installation.
First, install the linear electric cylinder in your machine according to the manufacturer's instructions. Make sure it's properly aligned and secured to avoid any vibrations or misalignment during operation.
Next, it's time to wire the cylinder to the PLC. This usually involves connecting power cables to the cylinder's motor and I/O cables to the PLC's input and output terminals. The wiring schema can vary depending on the specific models of the cylinder and the PLC, so it's crucial to follow the wiring diagrams provided in both the cylinder and PLC manuals.
When wiring, pay close attention to the polarity of the power cables and the signal levels of the I/O cables. Incorrect wiring can damage the equipment or cause the system to malfunction.
Step 4: Program the PLC
Now comes the programming part. This is where you tell the PLC how to control the linear electric cylinder. You'll be using a programming language supported by your PLC, such as ladder logic, structured text, or function block diagram.
First, you'll need to define the input and output addresses for the signals related to the cylinder. For example, you might assign an input address for the position sensor on the cylinder and an output address for the signal that controls the cylinder's movement.
Then, you'll write a program that contains the logic for controlling the cylinder. For instance, you can set up a program that starts the cylinder moving when a certain input signal is received and stops it when it reaches a specific position. You might also add logic for handling errors, such as over - force or over - temperature conditions.
Step 5: Testing and Debugging
Once you've finished programming the PLC, it's time to test the system. Start by powering on the PLC and the linear electric cylinder and running some simple test programs. Check if the cylinder moves as expected when you send control signals from the PLC.


If you encounter any issues, such as the cylinder not moving or moving in the wrong direction, don't panic. First, check your wiring to make sure everything is connected correctly. Then, review your PLC program to see if there are any logical errors.
You can use diagnostic tools provided by the PLC and the linear electric cylinder to help you identify and fix problems. For example, many cylinders have built - in sensors that can provide information about their status, such as position, speed, and force.
Step 6: Fine - Tuning and Optimization
After successful testing, you can start fine - tuning the system for optimal performance. This might involve adjusting the parameters of the linear electric cylinder, such as the acceleration and deceleration rates, to achieve the desired movement profile.
You can also optimize the PLC program to improve the efficiency of the system. For example, you can reduce the cycle time by minimizing the time the cylinder spends waiting between operations.
Tips and Tricks
- Documentation is Key: Keep detailed records of your wiring, programming, and any parameter settings. This will make it easier to troubleshoot problems in the future and to make modifications to the system.
- Safety First: Always follow safety protocols when working with electrical equipment. Make sure the power is turned off when making any wiring changes or performing maintenance.
- Get Training: If you're new to PLC programming or linear electric cylinder integration, consider taking a training course. This can help you gain the skills and knowledge you need to do the job right.
- Use Simulation Tools: Some PLC programming software and linear electric cylinder manufacturers offer simulation tools. These can be used to test your program and system design before you start the physical installation.
Conclusion
Integrating a linear electric cylinder with a PLC might seem daunting at first, but with the right approach and a bit of patience, it can be a straightforward process. By following these steps and using the tips and tricks I've shared, you'll be able to set up a reliable and efficient automation system.
If you're in the market for a high - quality linear electric cylinder, we've got you covered. Our Electric Linear Actuator is just one of the many great products we offer. Whether you're a small - scale manufacturer or a large industrial facility, we can provide the right solution for your needs.
If you have any questions or are interested in purchasing our products for your integration project, feel free to reach out and start a conversation. We're here to help you every step of the way.
References
- Manufacturer's manuals for linear electric cylinders
- PLC programming guides
- Industry standards for industrial automation and electrical safety


